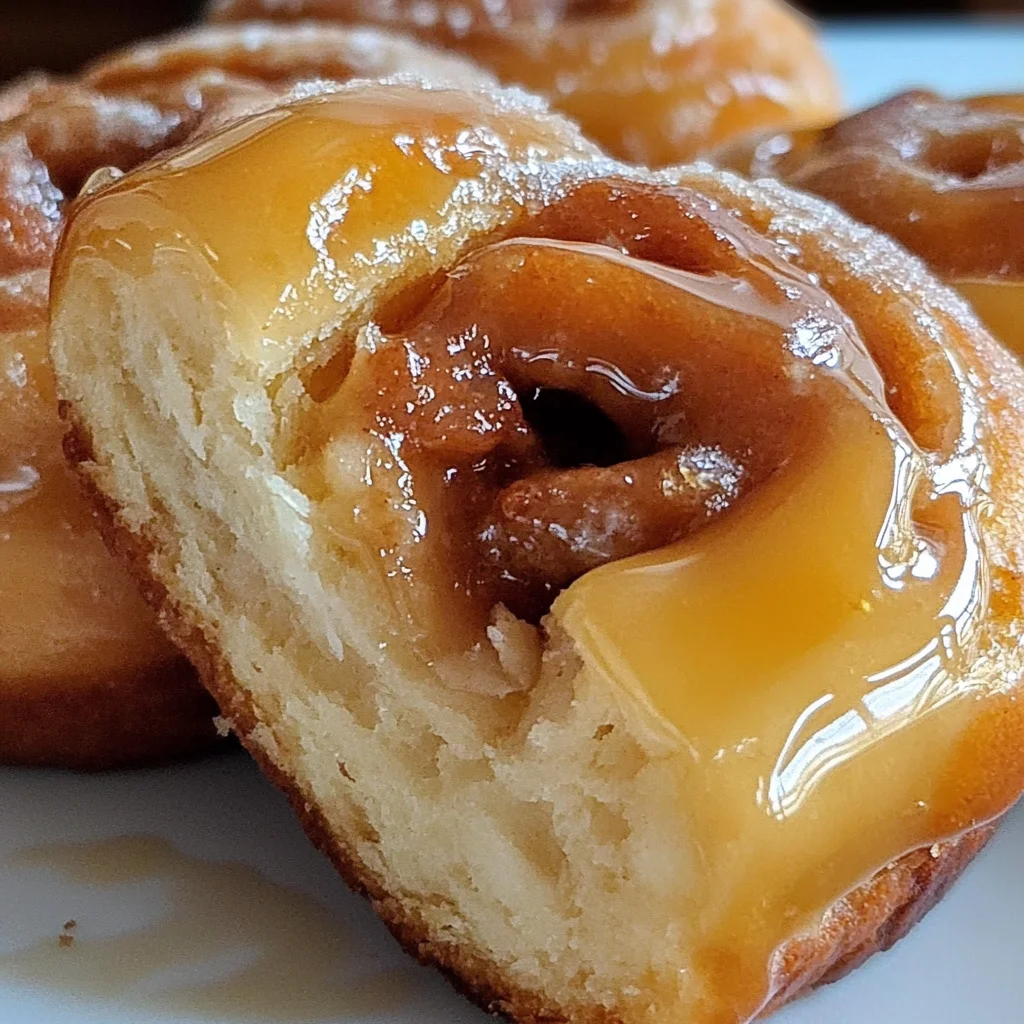
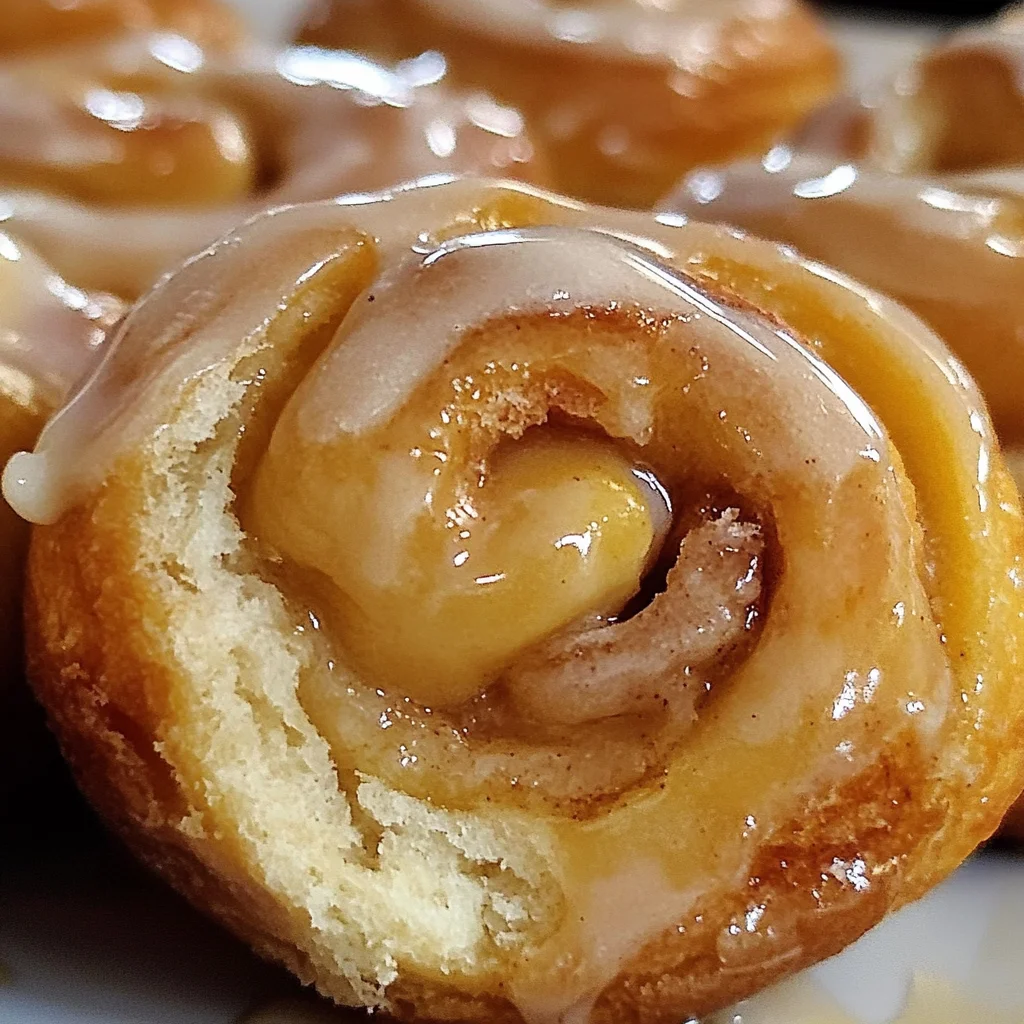
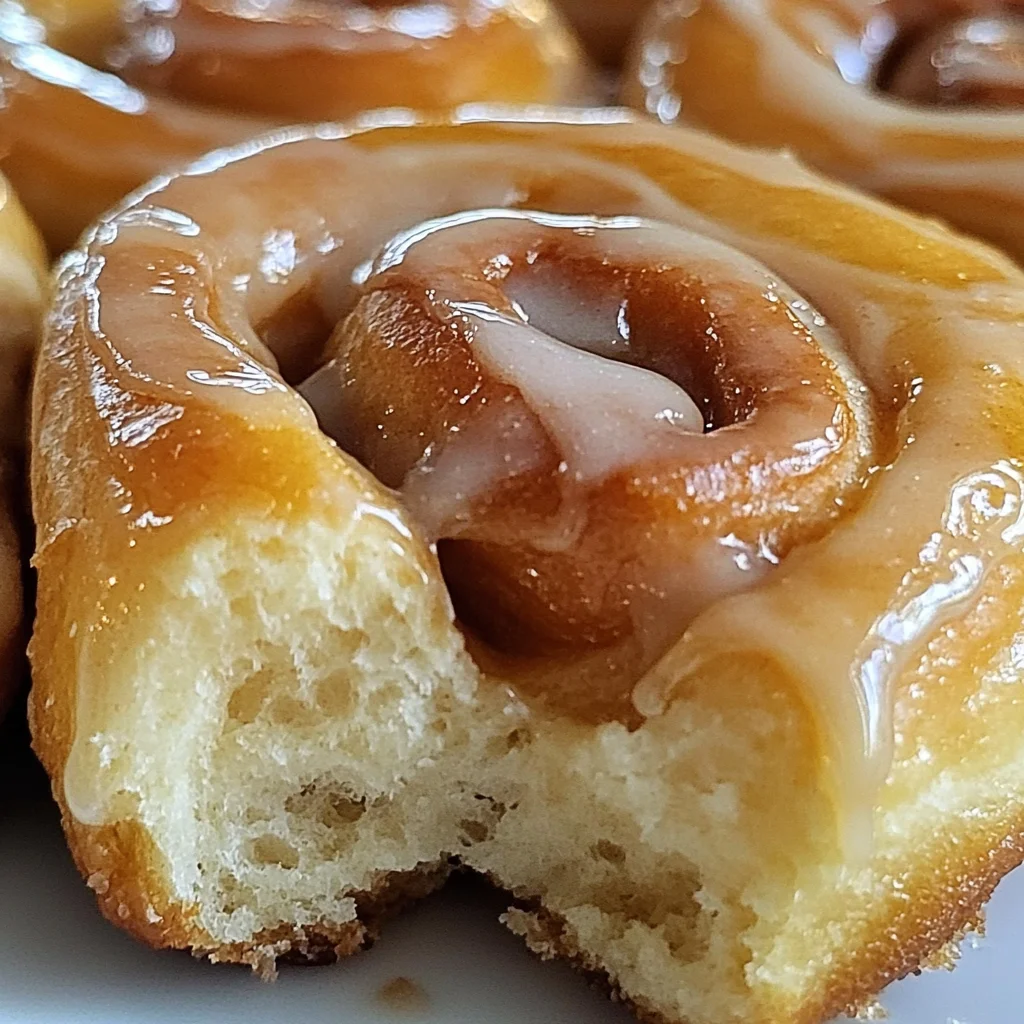
Homemade Honey Buns are a delightful treat that brings back fond memories of childhood. Their soft, pillowy texture and sweet glaze make them perfect for breakfast, dessert, or any occasion that calls for a touch of sweetness. These buns are not only easy to make but also customizable—add your favorite spices or toppings to make them uniquely yours!
Jump to:
- Why You’ll Love This Recipe
- Tools and Preparation
- Essential Tools and Equipment
- Importance of Each Tool
- Ingredients
- For the Dough
- For Frying and Glaze
- How to Make Homemade Honey Buns
- Step 1: Prepare the Dough
- Step 2: Knead the Dough
- Step 3: Shape the Buns
- Step 4: Fry the Buns
- Step 5: Prepare the Glaze
- How to Serve Homemade Honey Buns
- Pair with Coffee
- Add Fresh Fruit
- Drizzle with Extra Honey
- Use as a Dessert Base
- Serve Warm with Ice Cream
- How to Perfect Homemade Honey Buns
- Best Side Dishes for Homemade Honey Buns
- Common Mistakes to Avoid
- Storage & Reheating Instructions
- Refrigerator Storage
- Freezing Homemade Honey Buns
- Reheating Homemade Honey Buns
- Frequently Asked Questions
- Can I make these honey buns ahead of time?
- What can I use instead of butter?
- How do I store leftover honey buns?
- Can I flavor my homemade honey buns?
- Are there gluten-free alternatives for this recipe?
- Final Thoughts
- 📖 Recipe Card
Why You’ll Love This Recipe
- Delicious Flavor: The combination of cinnamon and honey creates a warm, inviting taste that everyone will love.
- Easy to Make: With simple ingredients and straightforward steps, even novice bakers can enjoy the process.
- Perfect for Any Occasion: Whether it’s a family gathering or a cozy weekend brunch, these honey buns fit right in.
- Customizable: Feel free to experiment with different toppings or fillings to suit your taste.
- Nostalgic Appeal: Enjoying homemade honey buns is like taking a trip down memory lane, bringing back comforting feelings.
Tools and Preparation
Gathering the right tools will make your baking experience smoother and more enjoyable. Here’s what you’ll need to prepare these delicious homemade honey buns.
Essential Tools and Equipment
- Large mixing bowl
- Measuring cups
- Measuring spoons
- Whisk
- Rolling pin
- Frying pan or deep fryer
- Cooling rack
Importance of Each Tool
- Large mixing bowl: A spacious bowl allows for easy mixing of ingredients without spills.
- Frying pan or deep fryer: Ensures consistent cooking temperature for perfectly fried honey buns.
- Cooling rack: Allows air circulation to keep the buns from becoming soggy after frying.
Ingredients
A favorite classic honey bun recipe with that famous glaze we all grew up loving.
For the Dough
- 2¼ cups all-purpose flour
- ¼ cup sugar
- ½ tsp salt
- ⅔ cup whole milk
- 1 packet instant yeast
- ⅓ cup butter (melted, cooled)
- 1 large egg
- 2 tsp vanilla extract
For Frying and Glaze
- 1½ tsp vegetable oil
- 2 tsp cinnamon
- 2-2½ cups vegetable oil (for frying)
- 3 tbsp butter (melted)
- 1¼ cup powdered sugar (sifted)
- 2 tbsp milk
- 2 tsp honey
- ½ tsp vanilla extract
How to Make Homemade Honey Buns
Step 1: Prepare the Dough
In a large mixing bowl, combine the all-purpose flour, sugar, salt, and instant yeast. Whisk together until well mixed. In another bowl, whisk together the warm milk, melted butter, egg, and vanilla extract. Pour the wet ingredients into the dry ingredients and mix until a dough forms.
Step 2: Knead the Dough
Turn the dough out onto a floured surface. Knead it gently for about 5 minutes until smooth and elastic. Place the dough in a lightly greased bowl and cover it with a cloth. Let it rise in a warm place for about 90 minutes or until doubled in size.
Step 3: Shape the Buns
Once risen, punch down the dough to release air bubbles. Roll it out into a rectangle about ½ inch thick. Brush with melted butter and sprinkle with cinnamon. Roll tightly from one end to form a log. Cut into 14 equal pieces.
Step 4: Fry the Buns
Heat vegetable oil in a frying pan over medium heat. Carefully place several pieces of dough into the hot oil and fry until golden brown on both sides—about 2-3 minutes per side. Remove from oil and drain on paper towels.
Step 5: Prepare the Glaze
In a small bowl, mix melted butter, powdered sugar, milk, honey, and vanilla extract until smooth. Drizzle over warm honey buns before serving.
Enjoy your delicious Homemade Honey Buns!
How to Serve Homemade Honey Buns
Homemade Honey Buns are delightful on their own, but they can also be served in various ways to enhance the experience. Here are some creative serving suggestions to enjoy these sweet treats.
Pair with Coffee
- A warm cup of coffee complements the sweetness of honey buns perfectly, making it a great breakfast option.
Add Fresh Fruit
- Serve with a side of fresh fruit like berries or sliced bananas to add a refreshing contrast to the rich flavors.
Drizzle with Extra Honey
- For an extra touch of sweetness, drizzle more honey over the top just before serving.
Use as a Dessert Base
- Cut honey buns in half and layer them with whipped cream and fruits for a delicious dessert parfait.
Serve Warm with Ice Cream
- Heat the honey buns slightly and serve them with a scoop of vanilla ice cream for an indulgent treat.
How to Perfect Homemade Honey Buns
To achieve the best results when making Homemade Honey Buns, follow these helpful tips for perfecting your recipe.
- Use Fresh Yeast: Ensure that your instant yeast is fresh for optimal rising and fluffy texture.
- Knead Properly: Knead the dough until smooth and elastic; this helps develop gluten for better structure.
- Let Dough Rise: Allow the dough to rise in a warm place until doubled in size, which improves flavor and texture.
- Monitor Oil Temperature: Maintain proper frying temperature (around 350°F) to ensure even cooking without greasiness.
- Sift Powdered Sugar: Sifting powdered sugar before mixing it into glaze prevents lumps, resulting in a smooth finish.
- Experiment with Flavors: Feel free to customize your glaze with different extracts, such as almond or citrus zest for additional flavor.
Best Side Dishes for Homemade Honey Buns
Homemade Honey Buns can be complemented by several side dishes that enhance their sweetness while adding variety to your meal. Here are some excellent options:
Fruit Salad
A mix of seasonal fruits adds freshness and balances the sweetness of honey buns.Greek Yogurt Parfait
Layer Greek yogurt with granola and fruit for a creamy and crunchy side that contrasts nicely.Scrambled Eggs
Soft scrambled eggs provide protein and savory flavor that pairs well with sweet honey buns.Cinnamon Apples
Sautéed cinnamon apples offer warmth and spice, enhancing the overall flavor experience.Nut Butter Dippers
Serve nut butters like almond or peanut butter for dipping, providing a nutty contrast to sweet buns.Chia Seed Pudding
A light chia seed pudding made with almond milk adds creaminess without overpowering the main dish.Trail Mix
A handful of trail mix brings crunch and nutty flavors that complement the soft texture of honey buns.
Common Mistakes to Avoid
Making Homemade Honey Buns can be delightful, but there are common pitfalls that can affect your results. Here are a few mistakes to watch out for:
- Skipping the yeast proofing: Always ensure your yeast is active before mixing it with other ingredients. This guarantees the dough will rise properly.
- Over-kneading the dough: Kneading is essential, but too much can lead to tough buns. Aim for a smooth texture without overdoing it.
- Inaccurate measurements: Baking is a science. Use measuring cups and spoons to ensure precision, especially with flour and sugar.
- Frying temperature issues: If the oil is too hot, the outside will burn while the inside remains raw. Use a thermometer or test with a small piece of dough first.
- Not letting the dough rise sufficiently: Patience is key! Allowing adequate time for rising helps create fluffy, light honey buns.
Storage & Reheating Instructions
Refrigerator Storage
- Store in an airtight container.
- Homemade Honey Buns can last up to 3 days in the refrigerator.
Freezing Homemade Honey Buns
- Wrap each bun individually in plastic wrap and place them in a freezer-safe bag.
- They can be frozen for up to 2 months.
Reheating Homemade Honey Buns
- Oven: Preheat to 350°F (175°C). Place buns on a baking sheet and warm for about 10 minutes until heated through.
- Microwave: Heat each bun for about 15-20 seconds on medium power. Be cautious not to overheat as they may become tough.
- Stovetop: Use a non-stick skillet over low heat. Cover and warm for approximately 5 minutes or until heated through.
Frequently Asked Questions
Here are some common questions about making Homemade Honey Buns:
Can I make these honey buns ahead of time?
Yes, you can prepare the dough and let it rise overnight in the refrigerator. Shape and fry them fresh in the morning.
What can I use instead of butter?
You may substitute with margarine or coconut oil if you’re looking for a dairy-free option while keeping the texture similar.
How do I store leftover honey buns?
Store them in an airtight container at room temperature for up to two days, or refrigerate for longer freshness.
Can I flavor my homemade honey buns?
Absolutely! You can add citrus zest or spices like nutmeg for extra flavor.
Are there gluten-free alternatives for this recipe?
Yes, you can try using gluten-free all-purpose flour blends designed for baking!
Final Thoughts
These Homemade Honey Buns are not just delicious but also versatile. You can customize them with different flavors or toppings, making them ideal for any occasion. Give this recipe a try and enjoy the sweet nostalgia they bring!
Did You Enjoy Making This Recipe? Please rate this recipe with ⭐⭐⭐⭐⭐ or leave a comment.
📖 Recipe Card
Print
Homemade Honey Buns
- Total Time: 50 minutes
- Yield: Approximately 14 servings 1x
Description
Homemade Honey Buns are a delightful treat that will transport you back to your childhood. With their soft and pillowy texture, sweet glaze, and warm cinnamon flavor, these buns are perfect for breakfast, dessert, or any occasion that calls for something special. Easy to make and highly customizable, you can add your favorite spices or toppings to create a unique version that suits your taste.
Ingredients
- 2¼ cups all-purpose flour
- ¼ cup sugar
- ½ tsp salt
- ⅔ cup whole milk
- 1 packet instant yeast
- ⅓ cup melted butter (cooled)
- 1 large egg
- 2 tsp vanilla extract
- 2 tsp cinnamon
- 3 tbsp melted butter (for glaze)
- 1¼ cup powdered sugar (sifted)
- 2 tbsp milk (for glaze)
- 2 tsp honey
- 2–2½ cups vegetable oil (for frying)
Instructions
- In a large mixing bowl, combine flour, sugar, salt, and instant yeast. Whisk together.
- In another bowl, mix warm milk, melted butter, egg, and vanilla extract. Pour into dry ingredients and mix until a dough forms.
- Knead the dough on a floured surface for about 5 minutes until smooth. Place in a greased bowl and let rise for about 90 minutes until doubled in size.
- Roll out the risen dough into a rectangle; brush with melted butter and sprinkle with cinnamon. Roll tightly into a log and cut into 14 pieces.
- Heat vegetable oil in a frying pan over medium heat. Fry the buns until golden brown on both sides—about 2-3 minutes per side.
- For the glaze, mix melted butter, powdered sugar, milk, honey, and vanilla until smooth. Drizzle over warm buns before serving.
- Prep Time: 20 minutes
- Cook Time: 30 minutes
- Category: Dessert
- Method: Frying
- Cuisine: American
Nutrition
- Serving Size: 1 honey bun (approx. 50g)
- Calories: 150
- Sugar: 8g
- Sodium: 60mg
- Fat: 6g
- Saturated Fat: 3g
- Unsaturated Fat: 2g
- Trans Fat: 0g
- Carbohydrates: 21g
- Fiber: <1g
- Protein: 2g
- Cholesterol: 25mg