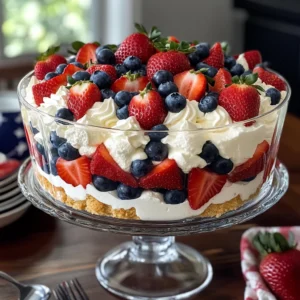
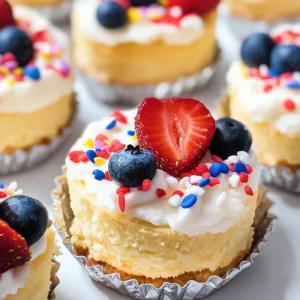
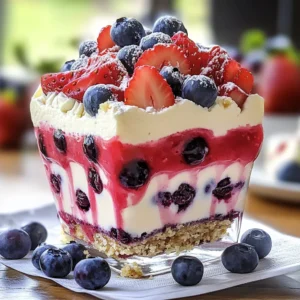
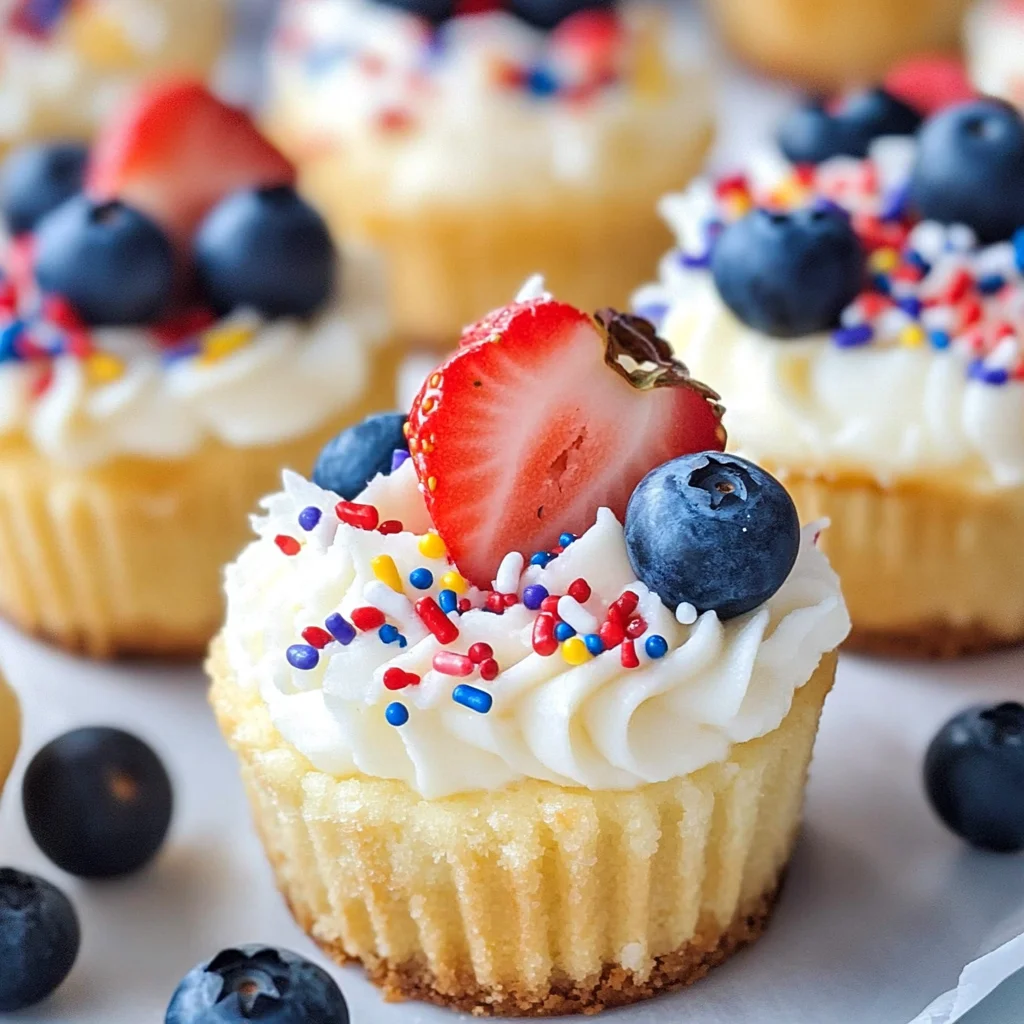
These Mini Cheesecakes with Vanilla Wafers are a delightful treat, perfect for any occasion! Their light and fluffy texture makes them an irresistible dessert, especially during celebrations like the 4th of July. Not only are they easy to make with basic ingredients, but they can also be customized with various toppings to suit your tastes. Enjoy these mini delights that are visually appealing and bursting with flavor!

Jump to:
- Why You’ll Love This Recipe
- Tools and Preparation
- Essential Tools and Equipment
- Importance of Each Tool
- Ingredients
- For the Cheesecake Filling
- For the Base and Topping
- How to Make Mini Cheesecakes with Vanilla Wafers
- Step 1: Prepare Your Pan
- Step 2: Make the Cheesecake Mixture
- Step 3: Assemble Your Mini Cheesecakes
- Step 4: Bake
- Step 5: Prepare the Topping
- Step 6: Decorate
- How to Serve Mini Cheesecakes with Vanilla Wafers
- Festive Fruit Toppings
- Creative Garnishes
- Themed Decorations
- How to Perfect Mini Cheesecakes with Vanilla Wafers
- Best Side Dishes for Mini Cheesecakes with Vanilla Wafers
- Common Mistakes to Avoid
- Storage & Reheating Instructions
- Refrigerator Storage
- Freezing Mini Cheesecakes with Vanilla Wafers
- Reheating Mini Cheesecakes with Vanilla Wafers
- Frequently Asked Questions
- Can I use different toppings?
- How do I prevent cracks in my mini cheesecakes?
- Can I make these Mini Cheesecakes with Vanilla Wafers ahead of time?
- What is the best way to serve mini cheesecakes?
- How long do these mini cheesecakes last?
- Final Thoughts
- 📖 Recipe Card
Why You’ll Love This Recipe
- Quick Preparation: You can whip up these mini cheesecakes in just 45 minutes, making them a great last-minute dessert option.
- Easy Customization: Switch out the toppings to fit any holiday or personal preference—think seasonal fruits or festive sprinkles!
- Perfect Portions: These mini bites are ideal for serving at parties, allowing guests to indulge without overindulging.
- Kid-Friendly Fun: Kids will love helping out in the kitchen, whether it’s mixing ingredients or adding their favorite toppings.
- Light and Fluffy Texture: The creamy filling combined with the crunchy vanilla wafer base creates a delightful contrast that everyone will enjoy.
Tools and Preparation
Before you start making these delicious mini cheesecakes, gather your tools. Having everything ready will streamline your cooking process.
Essential Tools and Equipment
- Mini cupcake pan
- Mixing bowls
- Electric mixer
- Measuring cups and spoons
- Spatula
Importance of Each Tool
- Mini cupcake pan: This tool is essential for creating perfectly portioned cheesecakes that cook evenly.
- Electric mixer: Saves time and effort while ensuring the cream cheese mixture is smooth and fluffy.
- Measuring cups and spoons: Accurate measurements are crucial for achieving the right balance of flavors in your cheesecakes.
Ingredients
To make these delightful Mini Cheesecakes with Vanilla Wafers, you’ll need the following ingredients:
For the Cheesecake Filling
- 2 8 oz Cream Cheese (softened)
- 3/4 cup Sugar
- 3 Eggs
- 1 tsp Lemon Juice
- 1 tsp Vanilla Extract
For the Base and Topping
- 48 Mini Nilla Wafers
- 1 8 oz Cream Cheese (softened)
- 2 cups Powdered Sugar
- 1 tsp Lemon Juice
- 1 tsp Vanilla Extract
- 1/2 cup Strawberries (diced)
- 1/2 cup Blueberries
- 1/2 cup Raspberries
- Red, White and Blue Sprinkles
How to Make Mini Cheesecakes with Vanilla Wafers
Step 1: Prepare Your Pan
Begin by preheating your oven to 325°F (163°C). Line your mini cupcake pan with paper liners or lightly grease it to prevent sticking.
Step 2: Make the Cheesecake Mixture
In a large mixing bowl, combine:
1. The softened cream cheese and sugar.
2. Beat until smooth using an electric mixer.
3. Add eggs one at a time, mixing well after each addition.
4. Stir in lemon juice and vanilla extract until fully incorporated.
Step 3: Assemble Your Mini Cheesecakes
- Place a Mini Nilla Wafer at the bottom of each cupcake liner.
- Pour the cheesecake mixture over each wafer until nearly full.
Step 4: Bake
Place the pan in the oven and bake for about 20 minutes or until set. Allow them to cool before removing from the pan.
Step 5: Prepare the Topping
While the cheesecakes cool:
1. In another bowl, beat together softened cream cheese, powdered sugar, lemon juice, and vanilla extract until smooth.
2. Top each cooled cheesecake with this mixture.
Step 6: Decorate
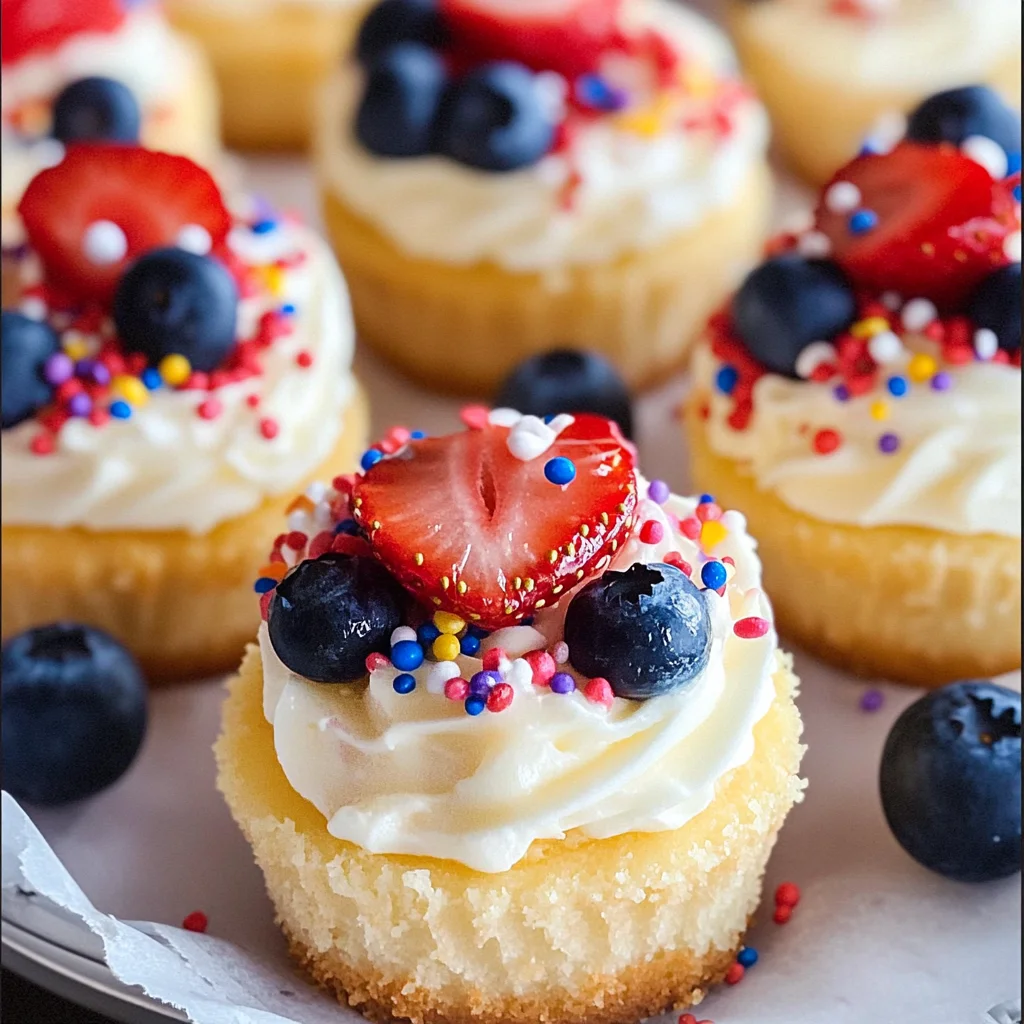
Garnish each cheesecake with diced strawberries, blueberries, raspberries, and sprinkles for a festive touch!
Enjoy your deliciously light Mini Cheesecakes with Vanilla Wafers, perfect for summer gatherings or any sweet tooth cravings!
How to Serve Mini Cheesecakes with Vanilla Wafers
Mini cheesecakes with vanilla wafers are versatile and can be served in various delightful ways. Whether for a holiday celebration or a casual gathering, these treats can be dressed up or down according to the occasion.
Festive Fruit Toppings
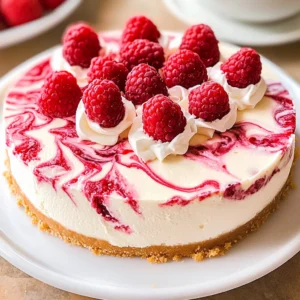
- Fresh Berries: Top with strawberries, blueberries, or raspberries for a colorful and refreshing finish.
- Fruit Compote: Spoon on homemade fruit compote for an extra layer of sweetness and flavor.
- Citrus Zest: Add a sprinkle of lemon or lime zest for a bright and zesty touch.
Creative Garnishes
- Whipped Cream: A dollop of whipped cream adds richness and makes your mini cheesecakes even more indulgent.
- Chocolate Drizzle: Drizzle melted chocolate over the top for a decadent look and taste.
- Nuts and Seeds: Sprinkle chopped nuts or seeds for added crunch and texture.
Themed Decorations
- Holiday Sprinkles: Use themed sprinkles to match the occasion, like red, white, and blue for 4th of July celebrations.
- Mini Flags: Insert small flags into each cheesecake for festive flair at parties.
How to Perfect Mini Cheesecakes with Vanilla Wafers
Creating the perfect mini cheesecakes requires attention to detail. Here are some tips to ensure they turn out just right.
- Chill Thoroughly: Allow the mini cheesecakes to chill completely in the refrigerator. This sets their texture and enhances flavor.
- Use Room Temperature Ingredients: Make sure your cream cheese is softened before mixing. This helps achieve a smooth batter without lumps.
- Don’t Overmix: Mix your ingredients just until combined. Overmixing can lead to a dense cheesecake rather than a light one.
- Check Doneness Carefully: Keep an eye on baking time; they should be set but still slightly jiggly in the center when done.
- Experiment with Flavors: Feel free to add different extracts or citrus juices for unique flavors beyond vanilla.
- Top After Cooling: Wait until the cheesecakes are fully cool before adding toppings. This prevents them from melting or becoming soggy.
Best Side Dishes for Mini Cheesecakes with Vanilla Wafers
Pairing side dishes with mini cheesecakes can enhance your dessert experience. Here are some excellent options that complement their sweetness perfectly.
- Fresh Fruit Salad: A mix of seasonal fruits adds freshness and balances the richness of the cheesecake.
- Light Salad with Citrus Dressing: A crisp salad dressed in citrus vinaigrette provides a refreshing contrast.
- Cheese Platter: Offer a selection of mild cheeses alongside crackers for savory bites that balance out sweetness.
- Chocolate-Covered Pretzels: The salty-sweet combo makes an excellent snack alongside mini cheesecakes.
- Granola Parfaits: Layer yogurt, granola, and berries in glasses for an appealing presentation that complements your dessert.
- Miniature Cookies: Serve bite-sized cookies as an additional treat; they’re easy to grab and enjoy alongside the cheesecake.
Common Mistakes to Avoid
When making Mini Cheesecakes with Vanilla Wafers, it’s easy to run into a few common pitfalls. Here are some mistakes to watch out for:
Using cold cream cheese: Always ensure your cream cheese is softened before mixing. Cold cream cheese can lead to lumps in your cheesecake batter, making it less smooth.
Overmixing the batter: Overmixing can introduce too much air into the batter, which may cause the cheesecakes to crack during baking. Mix just until combined for a perfect texture.
Skipping the lemon juice: Lemon juice adds essential flavor and helps balance the sweetness. Don’t skip it; otherwise, your cheesecakes may taste one-dimensional.
Not using a water bath: A water bath helps keep the temperature even while baking, preventing cracks. If possible, bake your mini cheesecakes in a water bath for best results.
Ignoring cooling time: Letting the cheesecakes cool gradually avoids sudden temperature changes that can cause cracks. Don’t rush this step; patience pays off!
Storage & Reheating Instructions
Refrigerator Storage
- Store mini cheesecakes in an airtight container.
- They will last up to 5 days in the refrigerator.
Freezing Mini Cheesecakes with Vanilla Wafers
- Individually wrap each mini cheesecake in plastic wrap.
- Place them in a freezer-safe container for up to 2 months.
Reheating Mini Cheesecakes with Vanilla Wafers
- Oven: Preheat to 350°F (175°C), place cheesecakes on a baking sheet, and heat for about 10-15 minutes until warm.
- Microwave: Heat one cheesecake at a time on medium power for about 15-20 seconds until warmed through.
- Stovetop: Not recommended as they may get soggy or unevenly heated.
Frequently Asked Questions
Here are some common questions regarding Mini Cheesecakes with Vanilla Wafers:
Can I use different toppings?
Absolutely! You can customize these mini cheesecakes with any fruits or toppings you like, such as chocolate sauce or crushed cookies.
How do I prevent cracks in my mini cheesecakes?
To prevent cracks, ensure your cream cheese is softened and mix gently. Using a water bath during baking also helps maintain even heat.
Can I make these Mini Cheesecakes with Vanilla Wafers ahead of time?
Yes! You can prepare them a day or two ahead of time and store them in the refrigerator until you’re ready to serve.
What is the best way to serve mini cheesecakes?
Serve them chilled and topped with fresh fruit or whipped cream for an extra touch of sweetness and color.
How long do these mini cheesecakes last?
When stored properly in an airtight container, they can last up to 5 days in the fridge or up to 2 months in the freezer.
Final Thoughts
These Mini Cheesecakes with Vanilla Wafers are not only delicious but also incredibly versatile. Perfect for any occasion, they can be customized with various toppings to suit your taste. Give this recipe a try and enjoy these delightful treats!
Did You Enjoy Making This Recipe? Please rate this recipe with ⭐⭐⭐⭐⭐ or leave a comment.
📖 Recipe Card
Print
Mini Cheesecakes with Vanilla Wafers
- Total Time: 40 minutes
- Yield: Makes approximately 16 servings 1x
Description
Indulge in the delightful taste of Mini Cheesecakes with Vanilla Wafers, a perfect treat for any occasion. These bite-sized desserts boast a light and fluffy texture, making them an irresistible choice for summer gatherings or festive celebrations. With a crunchy vanilla wafer base and a creamy filling, these mini cheesecakes are simple to prepare and can be customized with your favorite toppings, from fresh fruit to colorful sprinkles. In just 45 minutes, you can whip up these delicious treats that are sure to impress your guests. Whether you’re hosting a party or enjoying a cozy night in, these mini cheesecakes are the ideal way to satisfy your sweet tooth.
Ingredients
- 2 (8 oz) packages cream cheese (softened)
- 3/4 cup sugar
- 3 eggs
- 1 tsp lemon juice
- 1 tsp vanilla extract
- 48 Mini Nilla Wafers
- 2 cups powdered sugar
- Fresh strawberries (diced)
- Blueberries
- Raspberries
Instructions
- Preheat oven to 325°F (163°C). Prepare a mini cupcake pan by lining it with paper liners.
- In a mixing bowl, combine softened cream cheese and sugar; beat until smooth. Add eggs one at a time, mixing well after each addition. Stir in lemon juice and vanilla extract.
- Place a Mini Nilla Wafer in each cupcake liner and fill with the cheesecake mixture.
- Bake for about 20 minutes until set; allow to cool before removing from the pan.
- For the topping, beat together softened cream cheese, powdered sugar, lemon juice, and vanilla until smooth; spread on cooled cheesecakes.
- Garnish with diced strawberries, blueberries, raspberries, and sprinkles.
- Prep Time: 20 minutes
- Cook Time: 20 minutes
- Category: Dessert
- Method: Baking
- Cuisine: American
Nutrition
- Serving Size: 1 serving
- Calories: 170
- Sugar: 15g
- Sodium: 180mg
- Fat: 9g
- Saturated Fat: 4g
- Unsaturated Fat: 5g
- Trans Fat: 0g
- Carbohydrates: 20g
- Fiber: <1g
- Protein: 3g
- Cholesterol: 55mg